


There's nothing better on a summer's day than sitting back, listening to the latest music on your ipod and relaxing with an ice cold drink. Especially when you've got the barbeque going! (who doesn’t like barbeque food, right?).
Some people however, can be put off by the price of a top notch barbecue… as well as the cost of everything that goes with it.
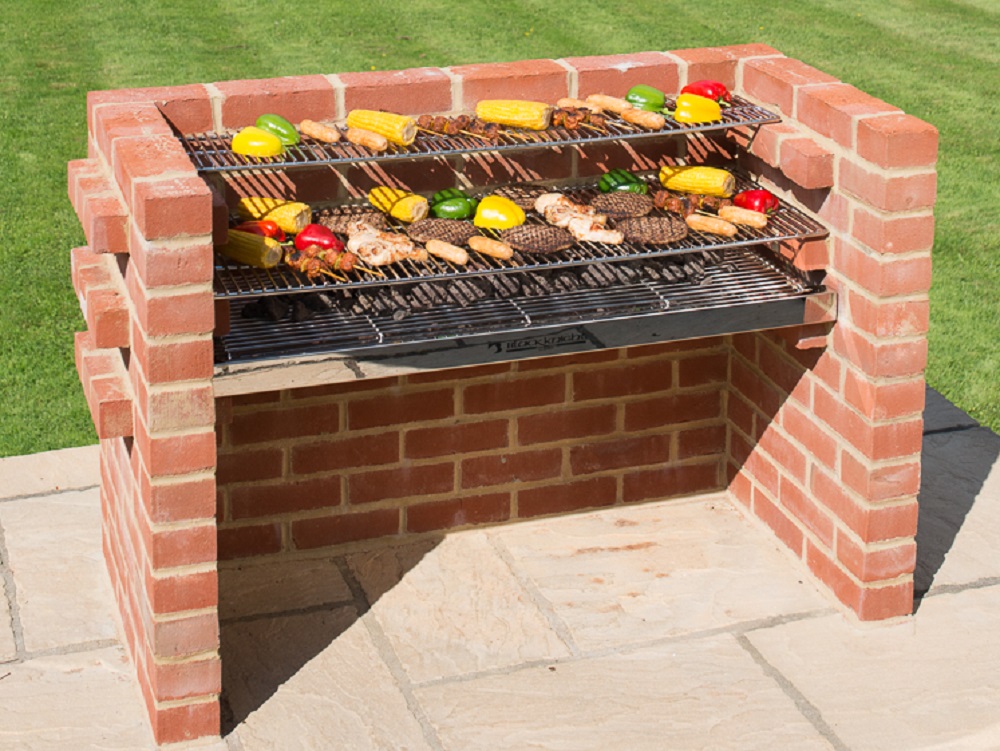
The best solution - build your own brick barbecue!
If you're not sure where to start though, don't worry. Our simple step-by-step guide takes you through everything you need to know.
Step 1
Before mixing your sand and cement, you should practice by laying out the first level of bricks - so you can determine the size of your barbecue.
You should also have a go at building up the corners in a staggered motion, filling up the centre of the first few runs - making sure the bricks in between each corner fit (and you don't have many bricks to cut). This is the way you will be putting your barbeque together when you have mixed your mortar.
You should also place your cooking tray in the centre of your bricks and use it as a guide.
Arranging your bricks into a large letter ‘E’ will mean you have plenty of space for food and utensils when finished.
Step 2
Next, mix 5 part sand and 1 part cement - adding enough water to get a stiff consistency.
You should also check the level of the site before spreading the first layer of mortar, compensating for any changes in level by adding more mortar.
This will become crucial later on when making sure the corners are even, so making sure you have an even surface is vital.
Step 3
Using your spirit level, mark the outer edge of the barbeque in cement (as shown). This will provide a guideline for laying the first run of bricks.
Its also advisable to continue checking levels using a spirit level as you continue to put more bricks in place. A brick trowel is the perfect tool for this job.
Step 4
Insert metal ties into the mortar between the inner and longer walls.
This will give the structure additional strength against the elements.
Step 5
As you start laying the additional courses, you should do so in a staggered motion, starting at the corners (as detailed before) Check each run with a spirit level as you go too.
This will ensure you end up with the traditional design.
Step 6
When you have built up each corner, you should now check your structure is at an even height.
To do so, find a large plank of wood and place it on top of two corners. Then place a spirit level on top of the wood to check the two are even.
Step 7
Once you get higher up, turn three or 4 bricks side-on (on both sides) to create a ledge for the charcoal tray.
Then, after another 2 to 3 courses, add another side-on course to support the grill tray.
Step 8
To give a more professional finish on the exterior of the barbeque, take a length of hosepipe or a brick jointer and draw it along each of the joints - removing excess mortar.
On the final run of bricks, don't put mortar on top (unless you want a work surface and decide to fix a paving slab on to the top)